|
The
DIAMOND
Project - 007 Clone by Dennis Dierking
My
interest in Mustangs began in the fall of 1985 while I was still a
Junior in high school. I remember walking into my auto shop class one morning and
sitting there was this Red car.
Shortly
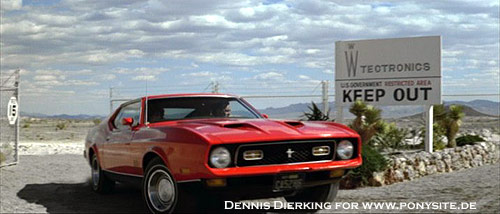
there after my brother-in-law asked me if I had seen the James Bond
movie “Diamonds Are Forever” as it featured a Red ‘71 Mach 1 as
the “Bond Car”.
In
2003, I received a “Diamonds Are Forever” DVD for my birthday and
after seeing the Mach 1 drive the streets of Las Vegas my desire to due
a “Bond” clone car was born.
|
|
|
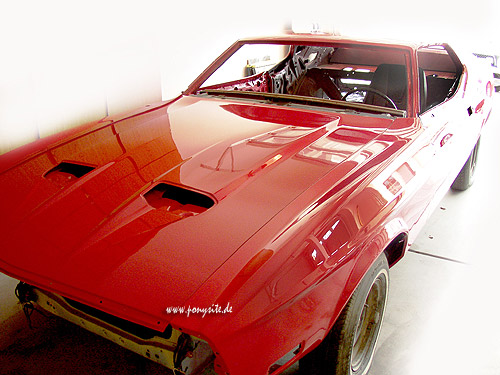
The Analysis, dissasembly and body treatment 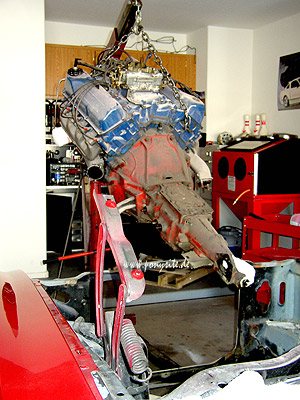 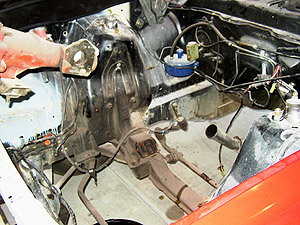
|
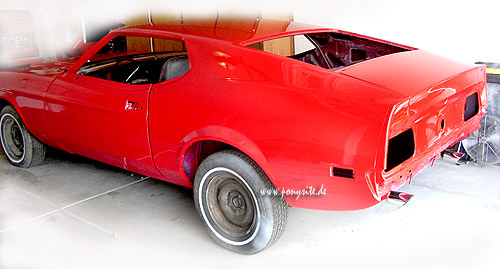
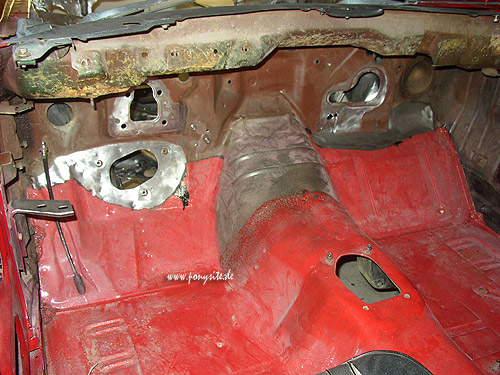
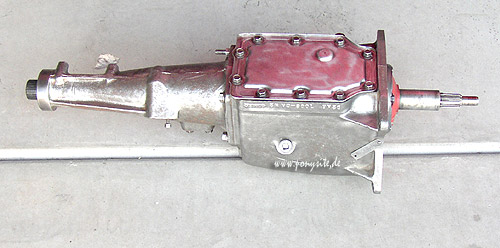
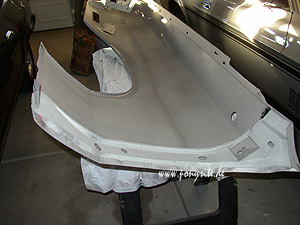
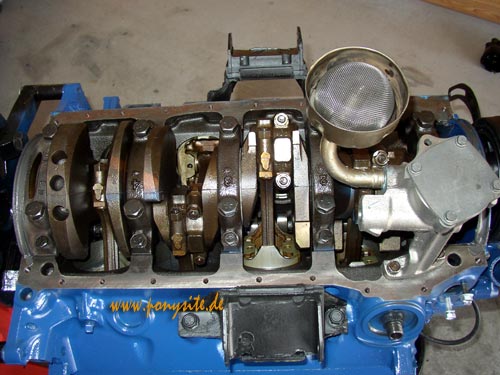
Upon getting the car home I immediately started working on it since I knew it was going to need a full restoration. The further into the car I got I began noticing more than a few similarities to the car I remembered from high school auto shop class. Feeling a bit nostalgic, I started to think could this be the same car? It’s been 18 years, and what are the chances that it would still be around. As I began taking apart the dash a piece of yellowed paper fell from behind the glove compartment; it was the insurance card with the guys name and address who had owned the car back in high school. So here was proof, it was the very same car! Which made me all the more excited to start my clone project. Between the “Bond” car website, the movie, and a magazine article from Mustang Monthly that featured the 429-movie car; I’ve been able to piece together how the car was equipped. The only differences between my car and the movie car will be that mine has a 4-speed transmission and no A/C. Everything else will match the movie car, including the undercarriage. I decided not to change the transmission because I find that a 4-speed is far more desirable and fun to drive when it comes to a muscle car. I elected not to install A/C because the car is a factory non-A/C car and I did not want to cut the firewall. Mechanically the engine and transmission have been redone to stock specifications. The carburetor is a Motorcraft 4300D spread bore 4-barrel with a new reproduction Ram Air setup. The valve covers are the finned aluminum style. The main body was in good shape and needed little prep work. The roof, the rear quarter panels, and the rocker panels only required minor sanding. However the trunk lid and hood were replaced with brand new panels and the front fenders and doors were removed so they could be media blasted. All of the drip rails and window trim pieces were polished and the rear bumper was rechromed.
|
|
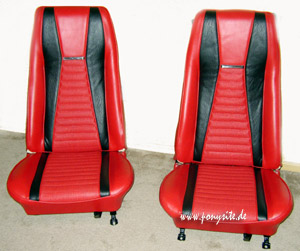
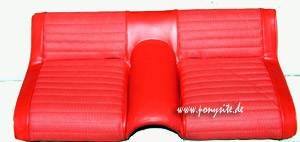
The
interior was completely redone to match the Vermillion Mach 1 interior
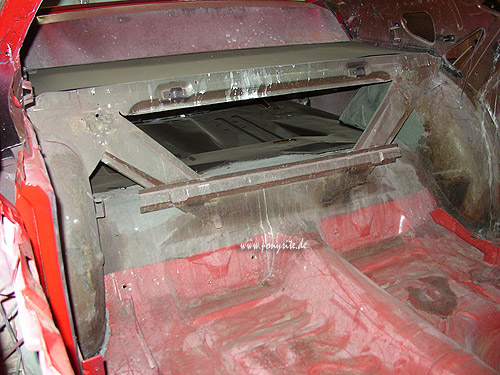
of the movie car. The floor
inside the car was sanded down and repainted to the body color.
I stripped and painted all of the seat frames before installing
new seat foam and the Vermilion seat covers.
I was able to obtain a two spoke deluxe steering wheel and a set of the deluxe seat belts along with an original AM/FM Stereo radio.
|
|
Progress 2006-2007 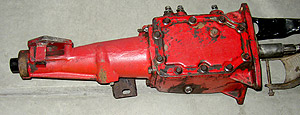 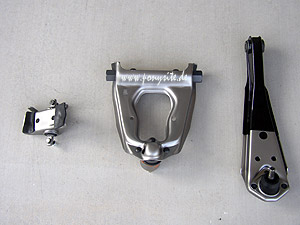 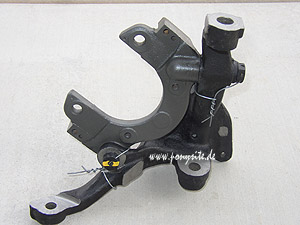
|
The finishing touch will be a set of reproduction Wide Oval pinstripe whitewall tires on standard wheels with hubcaps and trim rings along with a reproduction 1971 Nevada license plate with the same number (CA52H6) as the “Bond Car”. Remember, this car is still a work in progress. If everything progresses well I hope to have it completed by early 2008, ok. lets correct 2009 :). |
|
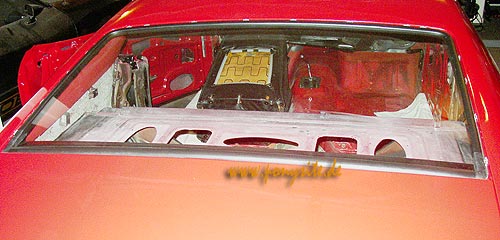
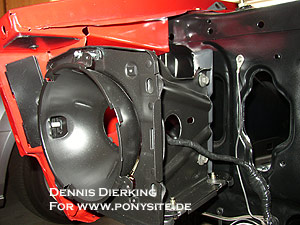
More progress 2008 I have the firewall insulation pad and the emergency brake assembly installed.
|
|
|
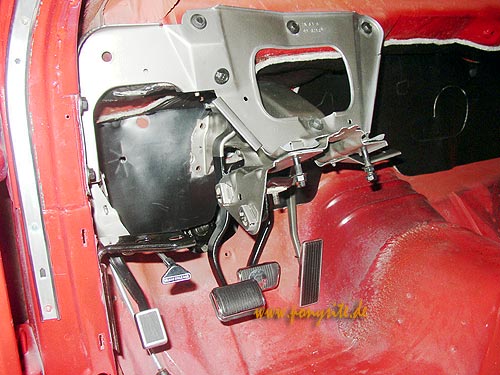
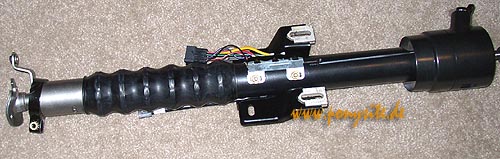
One of the next things was to install the rear window and the clutch and brake pedal assemblies. |
|
|
..and still in 2008
|
|
|
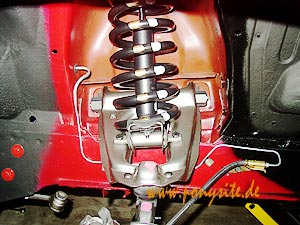
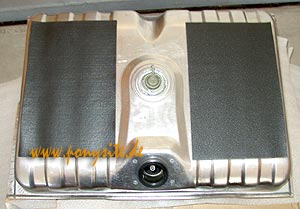
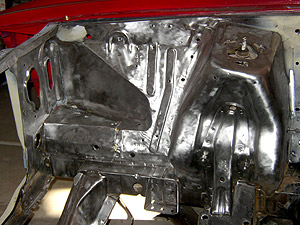
II have the undercarriage done incl. the gas tanke xcept for the driveshaft which I am still working on now. 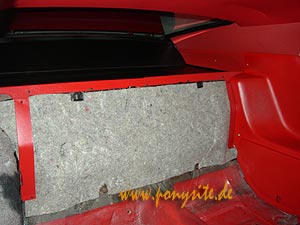 |
|
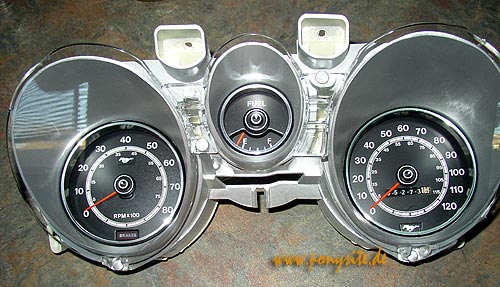
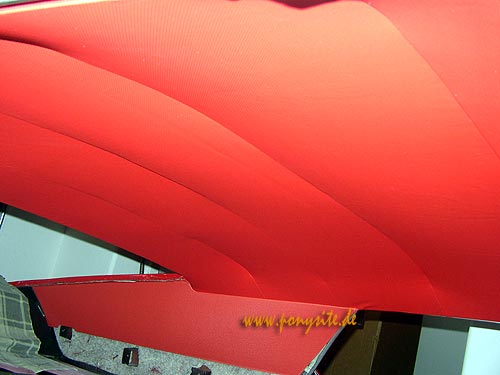
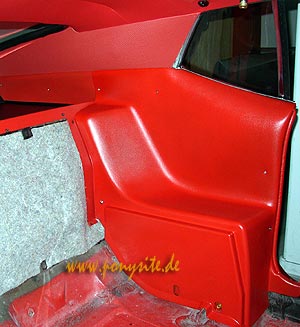
I have the
headliner
and package tray area done on the interior as well as the dash
re-installed
and the wiring behind the dash is also installed. I am
ready
to put the gauges and the radio and heater switch in now. 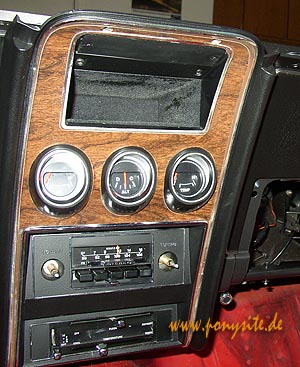 |
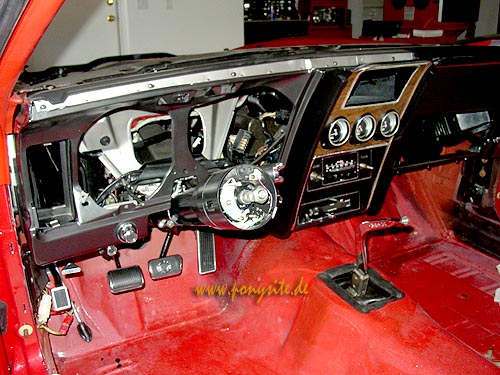 |
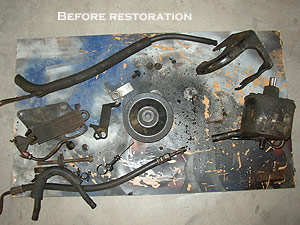
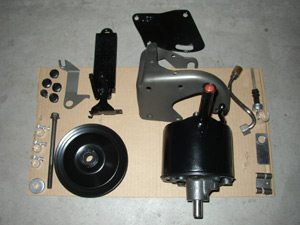
All that
is
left on the engine is the accessories, power steering, alternator,
and radiator. The toughest
one there is the radiator because I want one
with
the correct part number stamped into it and the correct Ford brass tanks.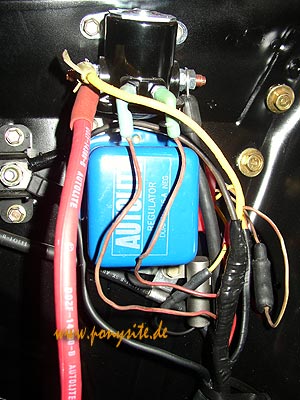 |
 |
| The finishing touches 2009 | |
|
I
had some time off during the winter holidays and was able to get some
more
work
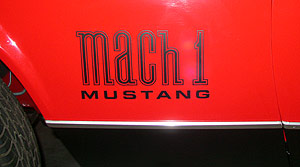
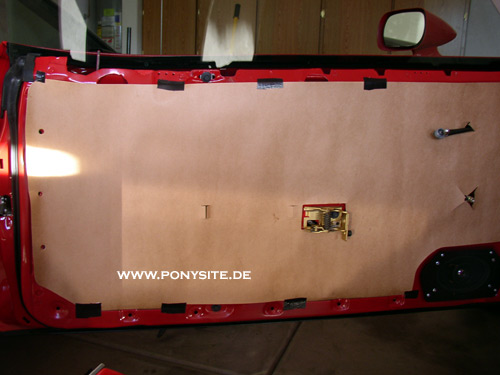
done on the car: Worked on the door panels and the windshield. I have installed the door glass and once the adjustments are finished on the glass I will install the door panels. I got the body side molding on finally. I was a little nervous about installing the pieces on the doors because there were no weld studs on them like there would have been on cars equipped with the molding from the factory. The molding clips are held on by a small stud that sticks out from the door. If you don't have the weld studs you have to drill a hole with a 1/8 drill bit and use a blind rivet and rivet the clips on. The tricky part is getting all six holes drilled in a straight line. I have been dreading this but I finally pushed myself to get it done and I am actually happy with the results as the molding on the door lines up nicely with the molding on the quarter panel and the fender. I put the taillights and honey comb panel on the rear as well as the stripe on the trunk lid and the Mach 1 letters on the fenders and trunk lid. The front bumper went on along with the front valance panel.
March
2009:
The
next photos I send will probably be of the completed car. I am finally
seeing the light at the end of the long tunnel! |
 Water protection sheets installed.. 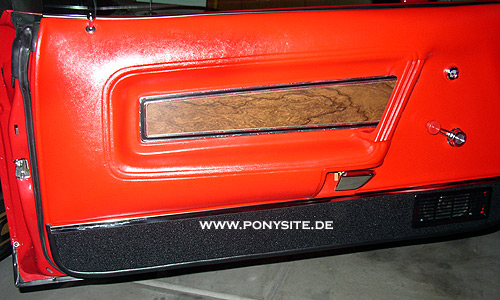 and finally properly finished on the inside 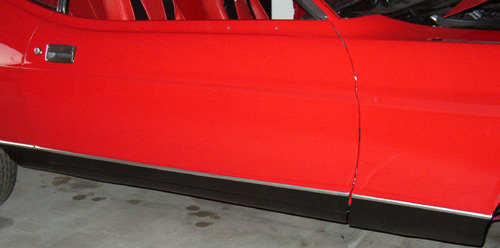 The doors are aligned 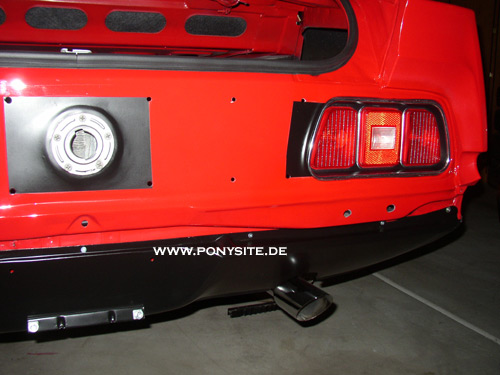 Rear end detailing 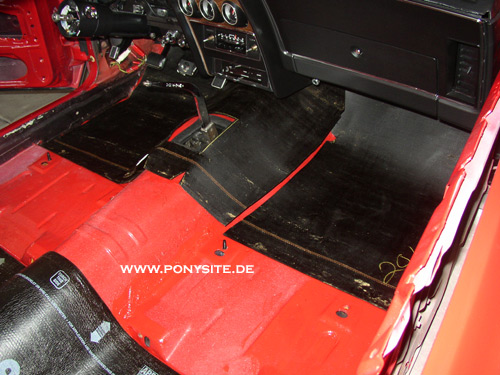 Carpet underlayment for road noise reduction 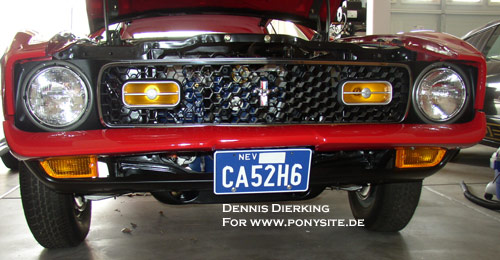 The finished front grille assembly with the replicated movie licence plate 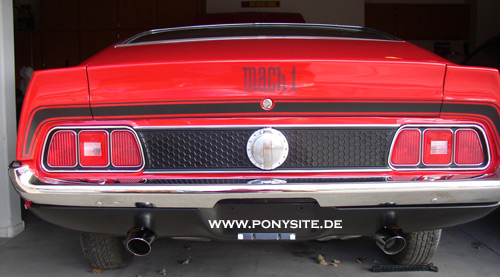 The finished rear end |
|
The car will appear finally in 2010 on the show circuits as one of the best replicas around. |
 |
|
2012- Dennis made it in
time- Pictures of the finished car - a timeless Bond style Diamond Mustang Mach 1 from 1971 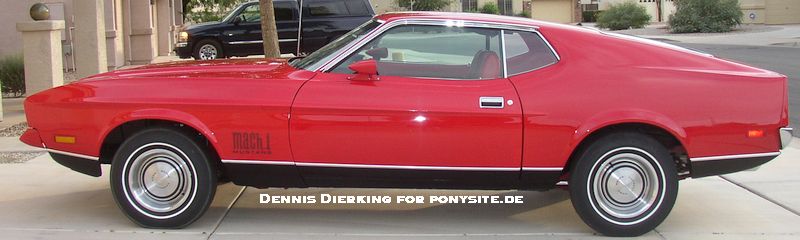 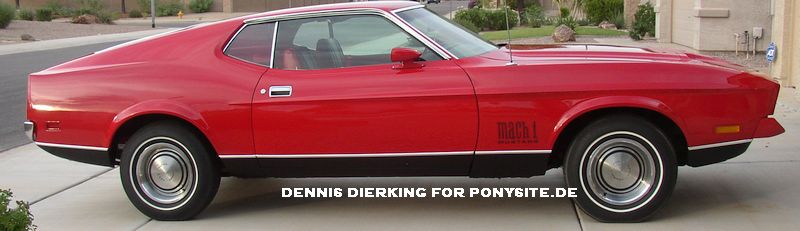 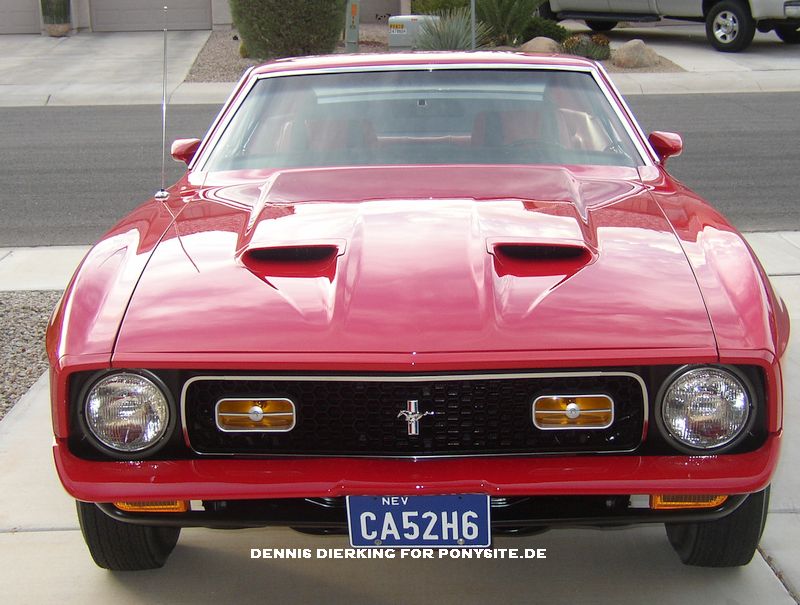 |
|